A pacifier can go from your baby’s mouth to the floor, stroller tray, diaper bag, or car seat in seconds. Knowing how to clean pacifiers safely helps you handle those everyday drops without reaching for harsh chemicals that do not belong near a baby’s mouth.
The goal is simple: remove visible dirt, wash away saliva and milk residue, and sanitize when your baby’s age, health needs, or the situation calls for it. A clean pacifier routine should protect your child without leaving behind strong fragrances, chemical residue, or damaged silicone.
Start With the Pacifier Manufacturer’s Instructions
Not every pacifier is made to handle heat the same way. Before boiling, steaming, or putting one in the dishwasher, check the package or manufacturer guidance. Most silicone pacifiers can tolerate regular washing and occasional heat sanitizing, but latex nipples, decorative shields, and multi-piece styles may require more care.
Look closely at the pacifier before you clean it. A nipple that is sticky, cracked, swollen, torn, or discolored should be replaced, not scrubbed back into service. Small cracks can hold moisture and residue, and a weakened nipple can become a choking hazard.
If a pacifier has detachable pieces, take it apart only if the manufacturer says it is designed to come apart. Tiny gaps are easy to miss during washing, but forcing components apart can damage the pacifier or make reassembly unsafe.
How to Clean Pacifiers Safely After Everyday Use
For a pacifier that has been used normally at home, a thorough wash is usually the right first step. Wash your hands, then rinse the pacifier under running water to remove loose debris. Use warm water and a small amount of mild, fragrance-free dish soap, paying attention to the nipple, shield, handle, and any seams.
Rinse thoroughly until no soap remains. This matters because babies suck and chew on pacifiers for long stretches, and leftover soap can irritate a sensitive mouth or create an unpleasant taste that makes a baby reject the pacifier.
Set the pacifier on a clean drying rack or fresh paper towel and allow it to air-dry fully. Avoid drying it with a dish towel that has been used for hands, counters, or dishes. A clean pacifier placed on a damp kitchen towel can quickly pick up the germs you just washed away.
For a simple daily rhythm, wash pacifiers after use when they are visibly soiled, after they fall on a dirty surface, and before you put them back into regular rotation. Keep at least a few clean spares available. That one small habit makes it much easier to skip the panic-cleaning shortcuts when your baby drops one in public.
When a Pacifier Needs Sanitizing, Not Just Washing
Cleaning and sanitizing are not the same. Washing removes dirt, saliva, oils, and residue. Sanitizing adds an extra germ-reduction step, which can be especially useful for babies younger than 2 months, babies born prematurely, or babies with weakened immune systems. If your child has special health needs, follow guidance from their pediatrician.
Sanitizing also makes sense after a pacifier lands in a high-germ area, such as a public restroom floor, a shopping cart, a pet bowl area, or the bottom of a stroller. If the pacifier falls somewhere visibly dirty, wash it first. Sanitizer works best on an already clean surface.
There are a few safe approaches, depending on what the pacifier is made of and what its instructions allow:
- Boiling: Place a heat-safe pacifier in a clean pot of boiling water for the amount of time specified by its manufacturer. Five minutes is common, but the product instructions always win. Let it cool completely before offering it to your baby, and squeeze out any water trapped inside the nipple.
- Steam sanitizing: A microwave steam bag or electric steam sanitizer can be convenient for daily use. Use it only with pacifiers labeled safe for that method, and follow the stated water amount and cycle time.
- Dishwasher sanitizing: Some pacifiers can go in the dishwasher’s top rack or a designated dishwasher basket. A dishwasher is useful for a full load of baby items, but only if the pacifier is labeled dishwasher-safe.
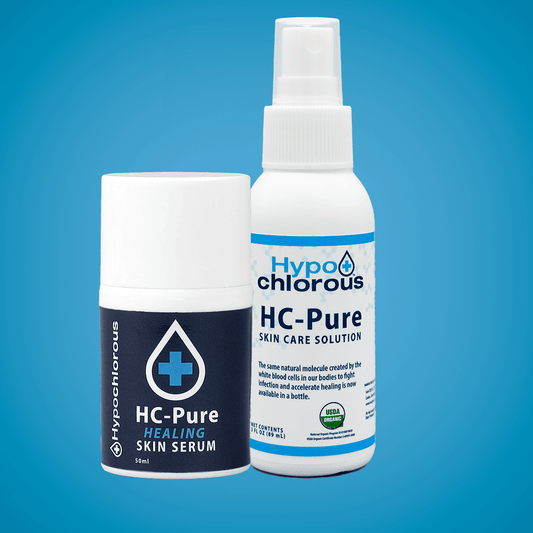
- Appropriate hypochlorous acid products: A ready-to-use hypochlorous acid formula can be a smart lower-toxicity option when its label specifically permits use on baby items or food-contact surfaces. Follow the required contact time and rinse instructions exactly. Never assume that a surface cleaner is safe for something that goes directly into a baby’s mouth.
What Not to Use on Pacifiers
Pacifiers are not the place for bleach, heavily fragranced cleaners, essential oils, alcohol sprays, or disinfecting wipes not designed for infant oral-care items. These products may leave residue, create strong odors, degrade the material, or require rinsing that is difficult to do thoroughly around seams and nipples.
Skip the old habit of “cleaning” a dropped pacifier by putting it in your own mouth. Adult saliva can transfer bacteria to a baby, even when you feel perfectly well. Wiping it on your shirt, rinsing it in a public sink without soap, or giving it back after a quick shake is not a reliable substitute for cleaning either.
You also do not need to scrub a pacifier with abrasive brushes or scouring pads. Silicone can scratch, and scratched surfaces are harder to clean well. A soft baby-bottle brush reserved for feeding gear can help with detailed styles, but gentle washing is usually enough.
A Clean Storage Routine Makes a Real Difference
A freshly cleaned pacifier can become dirty again if it is tossed loose into a diaper bag or cup holder. Store dry pacifiers in a clean, ventilated case. Wash that case regularly too, especially if it travels with snacks, diapers, keys, or loose toys.
At home, keep clean pacifiers away from the kitchen sink, pet feeding station, and bathroom counter. Those areas collect more splashes and germs than they appear to. If you are preparing several pacifiers at once, handle them with clean hands and avoid touching the nipple after washing.
For daycare, label each pacifier and send a clean storage case. Ask how dropped pacifiers are handled and whether staff can return soiled ones in a separate bag. This gives you a clear boundary: the clean ones stay ready for use, and the dropped ones come home for proper washing.
How Often Should You Replace a Pacifier?
Even excellent cleaning cannot make a worn pacifier safe forever. Many manufacturers recommend replacement every four to six weeks, though the right schedule depends on the pacifier’s material, condition, and how intensely your baby uses it. Check it before each use and replace it immediately if you see damage.
Pull the nipple in different directions and inspect the base where it joins the shield. Watch for changes in texture, trapped water that will not drain, fading, rough edges, or a nipple that has become tacky. If a pacifier has been chewed by a pet, run over by a stroller, or dropped in a place you cannot confidently clean, replacement is the safer call.
A safer baby routine does not require a cabinet full of harsh products. It requires clean hands, a few dependable habits, and the confidence to replace an item when washing is no longer enough. Keep clean backups within reach, and the next pacifier drop becomes a simple fix instead of a stressful moment.